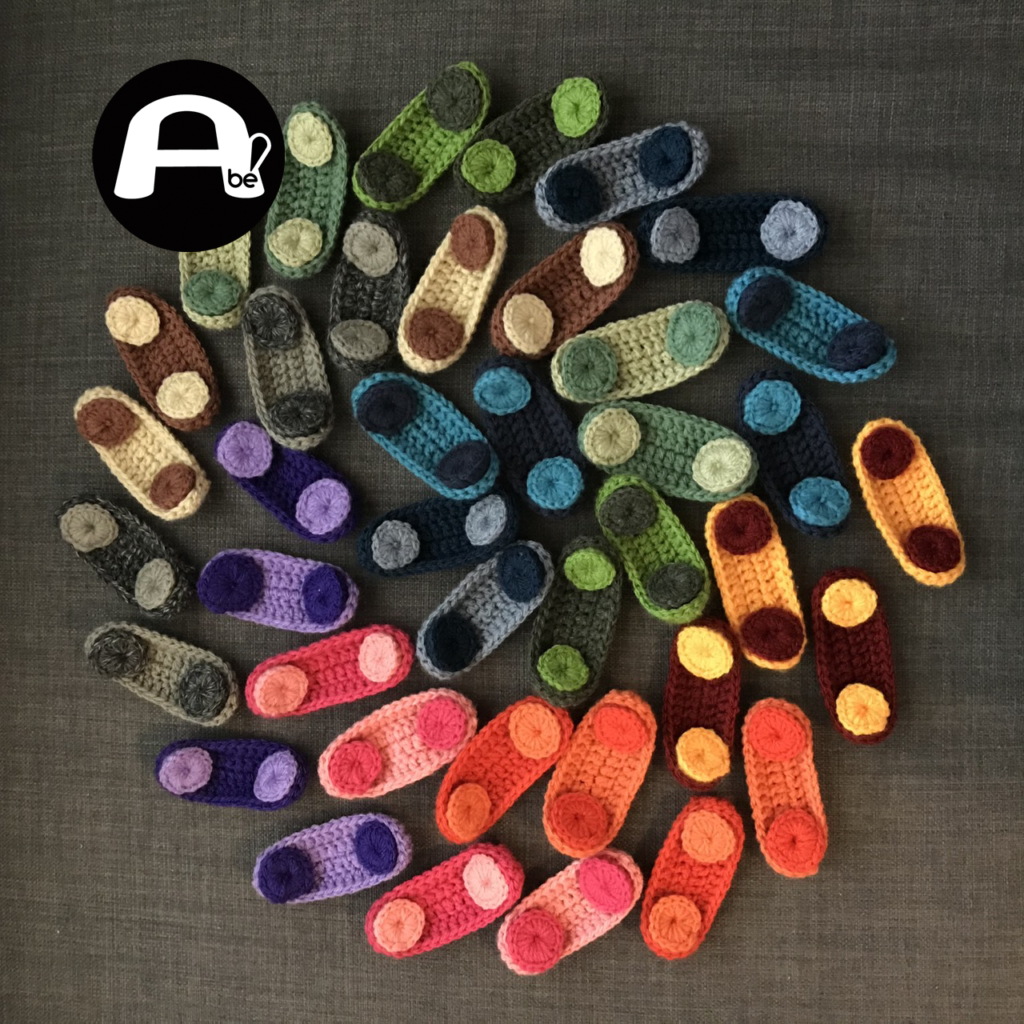
I created this face mask ear savers or ear protectors, thinking of all the healthcare workers that are spending an unbearable amount of hours helping others in need during the COVID-19 pandemic.
They are fast to do and can be easily washed since it is completely made with yarn. You can combine fun colors and more importantly they can ease the strain on ears while using a face mask for several hours.
You can follow the video instructions or find the pattern below. Please don’t sell or distribute this design as your own. Feel free to make them for yourself and loved ones, or donate them to your local heroes!
If you enjoyed this pattern please consider donating materials or money to The Mask Project Tampa Bay which is a group of people joining forces to create face masks and other basic goods for essential workers during this challenging times. Click here to learn how you can help.

FACE MASK EAR SAVER PATTERN
WHAT YOU NEED:
- 2 colors of cotton yarn
- 3.5 mm hook
- Scissors
- Stitch marker
- Hook with a thick handle (I use a 9 mm hook) or a sharpie
I also like to have handy a needle threader and a rubber band which I use to get a grip of the needle when it gets stuck as I am weaving in the ends of the yarn.
ABBREVIATIONS:
- st = stitch
- sl st = slip stitch
- sc = single crochet
- dc = double crochet
- inc = increase
INSTRUCTIONS:
BASE
Chain 16 (we will be working on both sides of the chain to create a continuous round).
Start at the 3rd stitch from the hook (mark your first stitch of every round)
- Round 1: 13 dc + 1 inc of 3 dc (the last one is in the opposite side of the chain) + 12 dc (on the opposite side of the chain) + 1 inc of 2 dc [ total of 30 st ]
- Round 2: 1 inc of 2 dc + 12 dc + 3 inc of 2 dc + 12 dc + 2 inc of 2 dc [ 36 st ]
- Closing: 1 dc + 1 sl st
Fasten off and weave in ends
BUTTONS
Make two 1 inch buttons
Wrap the yarn 12 times around a pen or a hook handle. Slip the yarn of and keep the center open.
- Round 1: Going through the center of the yarn (as if it is a magic ring) sc as many times until you cover the full circle
- Round 2: Going through the center of the yarn, and over the previous round, sc as many times until you cover the full circle
- Note: Keep going as much as you need until the until the center of the button is so small you struggle to put the hook through it.
- Closing: 1 sl st
Fasten off leaving a long tail. Weave in to place yarn tail in the middle of the button
BUTTON PLACEMENT
Note: I know that these buttons are meant to have the flat side down, but I like how they look with the flat side up in this particular project. Feel free to choose which option you prefer.
Sew in the buttons between the 1st and 2nd stitch and the 13th and 14th stitch aligned of the initial chain. Weave in ends.


